• Home
  • Portfolio
  • contact
  • Press
  • Blog
Menu

DEB NELSON DESIGN

  • Home
  • Portfolio
  • contact
  • Press
  • Blog
×

Deb Nelson Design Shiplap Ceiling

Before & After Budget Makeover: An Ugly Ceiling Gets An Affordable Transformation

Deborah Nelson September 25, 2019

In more than a few renovations I’ve run into some really bad ceilings.  Everything from old, crumbling and cracked plaster, to stucco, not to mention some pretty hideous ceiling tiles.  A personal pet peeve is when a house has a different ‘type’ of ceiling in every room, ie. one room is ceiling tile, another stucco, etc.  It’s amazing how changing it to one uniform ceiling can really unify and upgrade a space.

In this case, when I purchased a rental property of mine (pre-renovation), there was very ugly, dirty and worn ceiling tiles throughout.  The tiles were damaged from old leaks, warped and discoloured, some missing tiles in places – not very attractive. 

Of course drywall is always an option for covering a ceiling, but that would have meant having the drywall installed, taped, sanded and then painted.

 I was looking for a quick and affordable option to cover the ceiling and decided I would try a DIY shiplap on the ceiling.  I figured if I had inexpensive boards cut, then I painted it, I could have it installed professionally and I felt it would still beat the cost of drywall, taping and painting.  And I like the look of ship lap, adding some architectural details to the white space really helped to elevate the ceilings and gave the whole place a new look.

I have to say I love how this turned out.  The new white ceiling boards added texture and character to the space.  It was a pretty simple process; I’ll be posting a how-to on this ceiling in the coming weeks.  It went from ugly to charming pretty quickly, and was done on a budget!

 Before:

UP CLOSE, this is BAD!

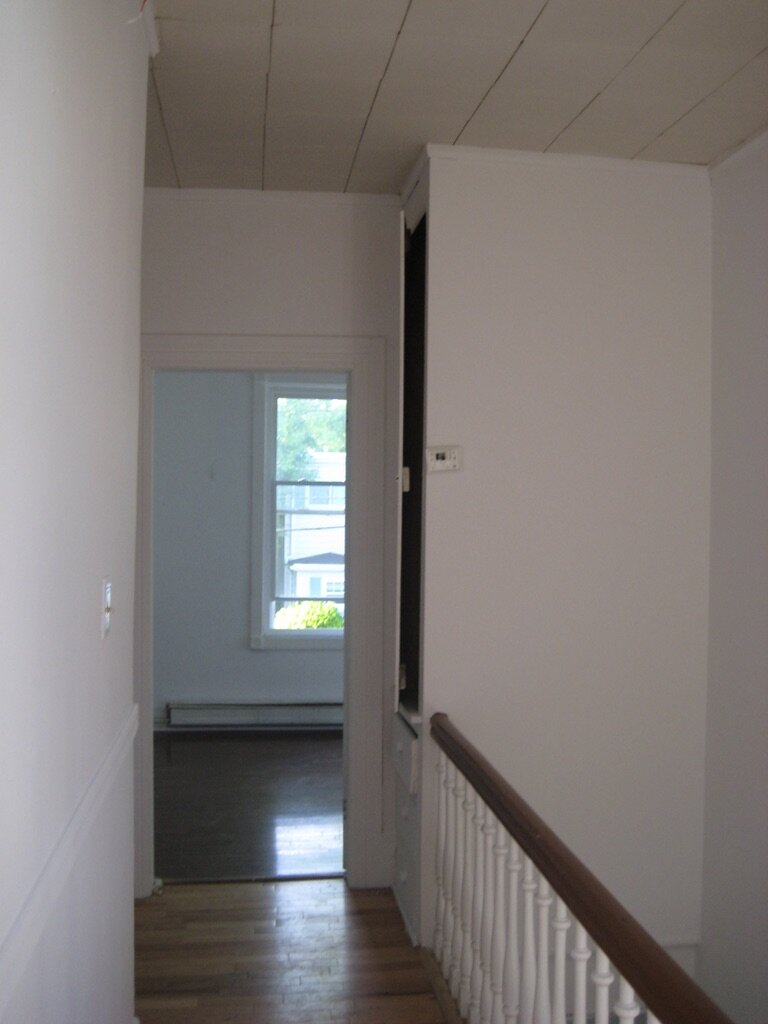
And here it is after:

Deb Nelson Design Shiplap Ceiling

After photos by Samson Learn

← YWCA Home for the Holidays 2019!White kitchens are my thing →

Categories


Before & After

Living Room

Renovation


INSTAGRAM

Starting to get into the Christmas spirit to be ready for the @ywcahalifax Homes for the Holidays happening November 22-24!  A bit of a natural holiday vibe from my place a few seasons back. This year I'll have it decked a little bit more! 🎄🎄🎄 📷:
Before & After of a much needed little bathroom renovation! The details and gory before pictures (have you ever seen a faucet attached by duct tape?!), are in the link in profile. #debnelsondesign #bathroomrenovation #smallbathroomdesign #beforea
Pretty little detail shot from my Chester sunroom. 📷: @samsonpix  #debnelsondesign #sunroomdecor #shells #showemyourstyled #sodomino #smmakelifebeautiful
A shot of some subtle holiday touches from my Chester place. Now that it's November it's time for me to start thinking holiday decor 🎄to get ready for @ywcahalifax Homes for the Holidays. Just a few weeks away and tickets are on sale now! 📷: @sianc
Lots more of this extensive renovation to show over the coming months!  A quick shot I snapped of my Chester kitchen which has been drastically transformed since the beginning. Swipe over to see the before shot!  #debnelsondesign #kitchenrenovation #
I used a variety of antiques in this guest room - the bed, chair, blanket and artwork were all items I've collected over time.  I love how they add so much character to a room, the antique charcoal sketch above the bed is dated from the 1800’s
Easing you into holiday decorating with one of my favourite past kitchens, featuring a tiny countertop tree and red wool blanket. I’m a big fan of subtle decorations that can make a space feel cozy and festive through the long winter months. My
Open shelving is one of my favourite ways to display those items in your kitchen that are both functional and full of character, like cutting boards, dishes, glassware and even quirky bottle openers 📷: @samsonpix⁣
⁣
#debnelsondesign⁣
#openshelving ⁣

© 2019 DEB NELSON DESIGN