• Home
  • Portfolio
  • contact
  • Press
  • Blog
Menu

DEB NELSON DESIGN

  • Home
  • Portfolio
  • contact
  • Press
  • Blog
×

vase-pix-edit.jpg

DEB'S DIY: CREATE A COLOURFUL VASE

Deborah Nelson September 17, 2015

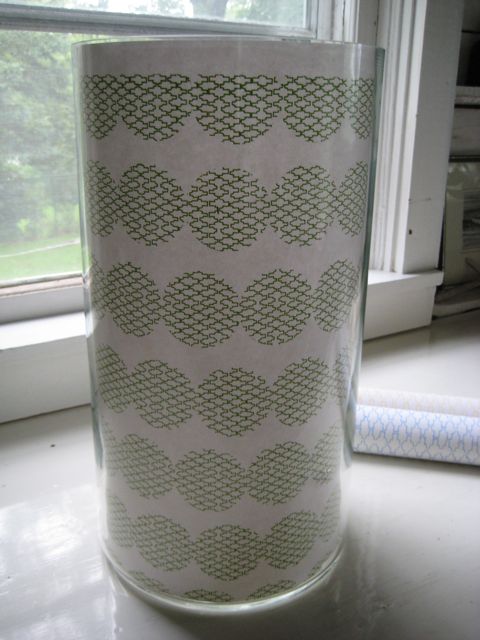
This is an easy DIY and all you need is a clear vase and some decorative paper. The idea is to line a clear vase with patterned paper – it can be any kind of paper – maybe left over wallpaper, wrapping paper, etc. You can use the vase to hold items, like rolls of wrapping paper or branches (any dry arrangement that doesn't require water). Another fun part of this DIY is that you can use it over the holiday season with your favourite wrapping paper, or for a children's birthday party and match the wrapping paper in the vase to the theme of the party. The options are endless! Here are the simple steps:

Use a clear, clean vase.

vase1

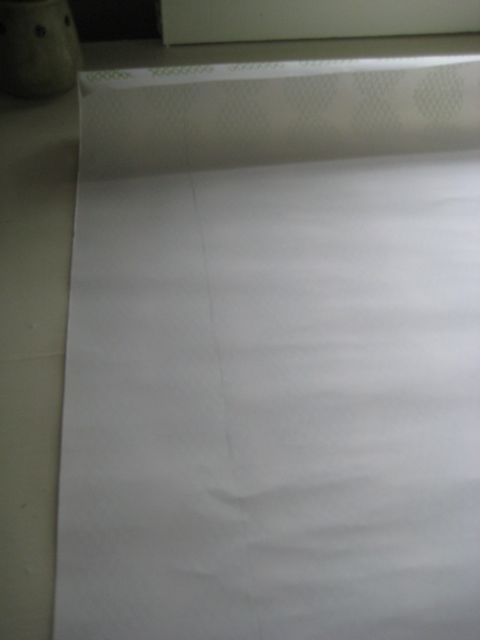
Make sure the paper is wide enough to wrap in the vase. Use the vase to measure the height of paper.

vase 2

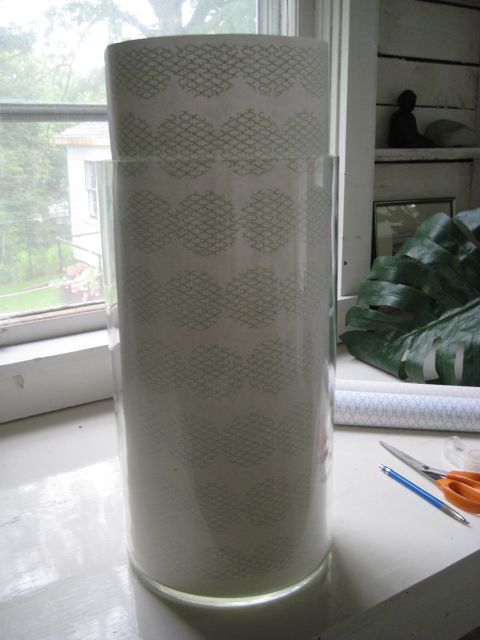
Use a pencil to mark where you need to cut the paper to fit.

vase3

Place the paper in the vase, I put the 'cut' edge of the paper at the bottom of the vase. I also used a bit of clear tape on the inside to keep the paper taped in place.

vase 4
vase4
In Deb Nelson Design, DIY, Inspiration, wallpaper Tags craft project with paper, craft project with vase, craft project with vase and paper, deb nelson diy, Deb Nelson vase, diy, DIY with vase, easy DIY holiday, easy DIY with clear vase, make a unique vase, seasonal DIY, seasonal vase decor, simple DIY, simple DIY holiday
sleigh-pix-edit.jpg

SIMPLE HOLIDAY DIY IDEAS

Deborah Nelson December 15, 2014

I try to incorporate a few simple, DIY holiday items around this time of year. Here are a couple of my favourites from my own house – very easy ideas and some you can leave up all winter. The sled above is an antique luge that I love leaving out all winter.

Vases filled with inexpensive red balls just add a festive look to tables or mantels. So simple!

vases

I also like to bring in some boughs, cedar, fir or pine and use this in vases around the house too. Just some simple ways to bring in some festive, bright decor.

vase 2
sleigh
In Deb Nelson Design, DIY, Holiday, Inspiration Tags deb nelson diy, Deb Nelson holiday, deb nelson holiday decor, diy, easy holiday decor ideas, easy holiday DIY, easy holiday ideas, holiday decor, holiday DIY, simple holiday DIY
table-after-pix-edit.jpg

DIY: UPDATE A COFFEE TABLE

Deborah Nelson November 13, 2014

This little DIY was something I thought would be an easy change. I had this old coffee table and the brushed silver legs were feeling dated and tired. To give the coffee table a new look, I've painted the legs with a metallic paint with a bronze iridescent finish. Here is the BEFORE:

IMG_1587

And here is the AFTER. The process of painting the legs might have taken 10 minutes and was very easy to apply. I'm on an antique bronze/brass kick, so I've been painting a few different objects which I will continue to share. I love the results!

table after
In Before & After, Design, DIY, Furniture, Inspiration Tags before and after, coffee table, coffee table before and after, coffee table DIY, Deb Nelson coffee table, Deb Nelson coffee table DIY, Deb Nelson coffee table update, deb nelson diy, diy, easy and simple coffee table update, furniture before and after, furniture makeover, ikea hack, paint a coffee table, paint coffee table legs, redo a piece of furniture, refinish coffee table, update a coffee table, update a piece of furniture
diy6-edit-pix.jpg

DIY: CREATE A STYLISH PILLOW

Deborah Nelson November 10, 2014

A very simple, inexpensive DIY idea is to use a stencil and fabric screen printing ink to add some pattern to a solid piece of fabric. I happened to have some white cotton pillow covers, so I decided to add some colour and pattern. It's as easy as holding the stencil on the fabric and tapping on the ink. The great part is you could use this idea for just about anything: a table cloth, place mats, napkins, pillows, etc. There are lots of different stencils and ink colours, so the options are pretty endless. Here are the pictures of my progress right up to the pillow in my living room.

diy 1
diy 2
diy 3
diy 4
diy5
diy6
diy7
In Accessories, Design, DIY, Inspiration Tags add colour and pattern to a white pillow, deb nelson diy, Deb Nelson pillow, Deb Nelson stencil, diy, DIY pillow, DIY with stencil and ink, easy diy, how to make a stylish pillow, how to stencil, how to stencil a pillow, projects with ink, projects with pillows, projects with stencil and ink, simple and stylish DIY ideas, stencil, stencil and ink, stencil on a pillow, using fabric ink to stencil a pillow
table-red-legs.jpg

DIY: MAKE ANY TABLE WITH THESE FLOYD LEGS

Deborah Nelson October 27, 2014

I think these Floyd legs are a very smart idea – they attach to any flat surface to create a table. The legs come in two heights (one is for coffee tables and the other is for a desk) and several different colours. The clamps are removable so you can easily move the table, or change the table size or change the type of material in the table. I think it's a stylish look and such a practical idea – a simple DIY that gives you tons of options! The legs can be ordered at thefloydleg.com and they will ship to Canada for an extra cost.

Here are some ideas of what you can make with them, they also now sell brackets to create shelving. One thing they mention is that these are best for mid-weight materials and also aren't meant to be huge dining tables (they can't handle that kind of weight). I hope to be trying out the coffee table legs, using an old thick plank of wood I have. The big decision is what colour leg to go with!

table 1 j
IMG_1426
1414089824443
1414176587014
In Design, DIY, Furniture, Inspiration Tags buy the floyd leg, buy the floyd leg in Canada, colourful table legs, cool idea to make a table, deb nelson design, deb nelson diy, Deb Nelson DIY ideas, diy, DIY a table, Floyd leg, great DIY for a table, make your own table, ship the floyd leg to Canada, use the floyd leg, using the floyd leg
Older →

Categories


Before & After

Living Room

Renovation


INSTAGRAM

Starting to get into the Christmas spirit to be ready for the @ywcahalifax Homes for the Holidays happening November 22-24!  A bit of a natural holiday vibe from my place a few seasons back. This year I'll have it decked a little bit more! 🎄🎄🎄 📷:
Before & After of a much needed little bathroom renovation! The details and gory before pictures (have you ever seen a faucet attached by duct tape?!), are in the link in profile. #debnelsondesign #bathroomrenovation #smallbathroomdesign #beforea
Pretty little detail shot from my Chester sunroom. 📷: @samsonpix  #debnelsondesign #sunroomdecor #shells #showemyourstyled #sodomino #smmakelifebeautiful
A shot of some subtle holiday touches from my Chester place. Now that it's November it's time for me to start thinking holiday decor 🎄to get ready for @ywcahalifax Homes for the Holidays. Just a few weeks away and tickets are on sale now! 📷: @sianc
Lots more of this extensive renovation to show over the coming months!  A quick shot I snapped of my Chester kitchen which has been drastically transformed since the beginning. Swipe over to see the before shot!  #debnelsondesign #kitchenrenovation #
I used a variety of antiques in this guest room - the bed, chair, blanket and artwork were all items I've collected over time.  I love how they add so much character to a room, the antique charcoal sketch above the bed is dated from the 1800’s
Easing you into holiday decorating with one of my favourite past kitchens, featuring a tiny countertop tree and red wool blanket. I’m a big fan of subtle decorations that can make a space feel cozy and festive through the long winter months. My
Open shelving is one of my favourite ways to display those items in your kitchen that are both functional and full of character, like cutting boards, dishes, glassware and even quirky bottle openers 📷: @samsonpix⁣
⁣
#debnelsondesign⁣
#openshelving ⁣

© 2019 DEB NELSON DESIGN