• Home
  • Portfolio
  • contact
  • Press
  • Blog
Menu

DEB NELSON DESIGN

  • Home
  • Portfolio
  • contact
  • Press
  • Blog
×

art-edit1.jpg

BEFORE & AFTER: SMALL SPACE RENO

Deborah Nelson October 21, 2014
pic 1

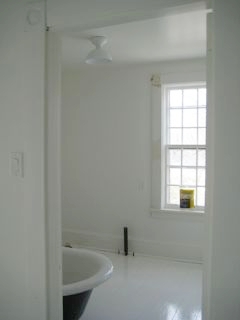
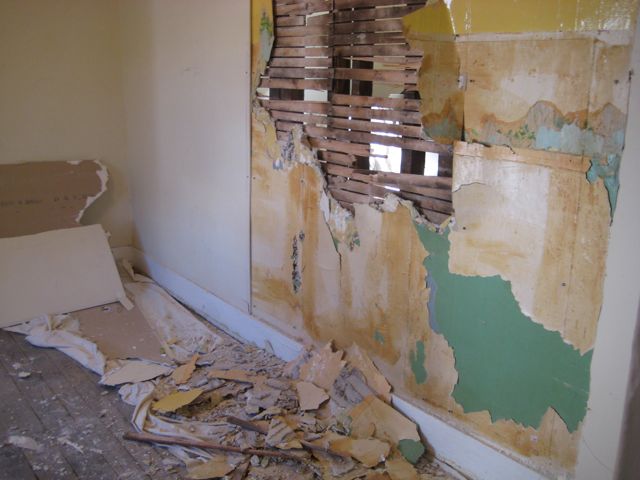
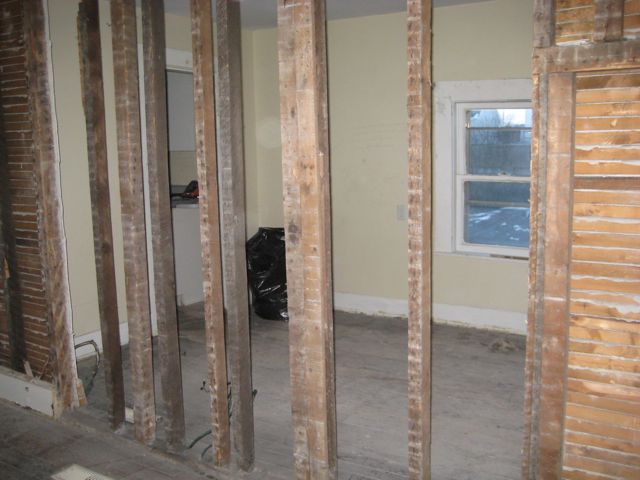
Back a couple of years ago I was renovating a small apartment above my office. This was an extremely small space with a tiny bathroom, kitchen and two small rooms. As soon as I saw the space I knew I wanted to open up the wall between the two small rooms, to make one larger room as the main living area. This would help with light and would open up the whole space.  Also, I was able to lift the old linoleum floor and uncover the original wooden floors underneath. My Dad helped me lift the many layers of old flooring, you can see the floor removal on the right hand side of the first picture. Here it is as the floor is coming up and the wall starts coming down.

pic2

Great to see the light is starting to come through from the other side.

pic3

Finally opened up! Love seeing through to the other side.

pic 4

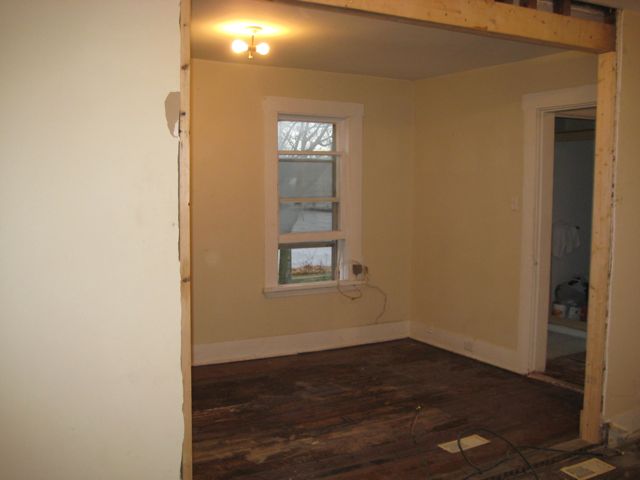
Here it is opened, now time for drywall, lighting and paint.
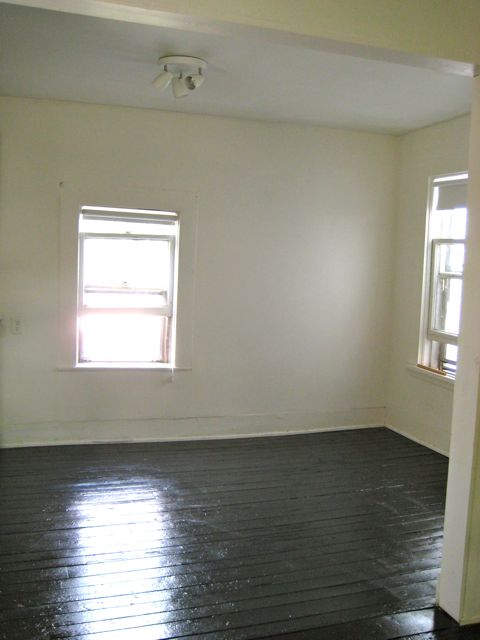
Here it is painted.

paint 1
painted 2
painted 3

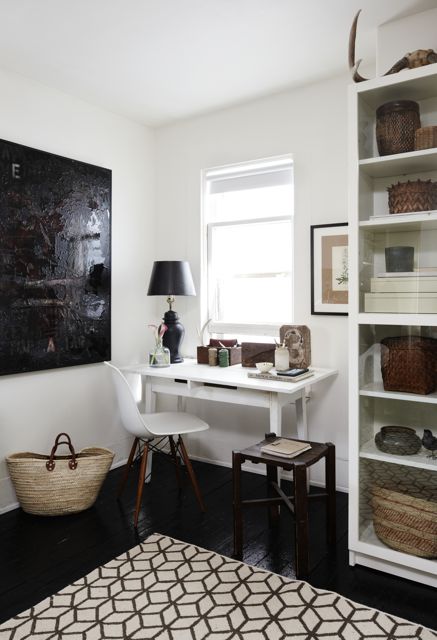
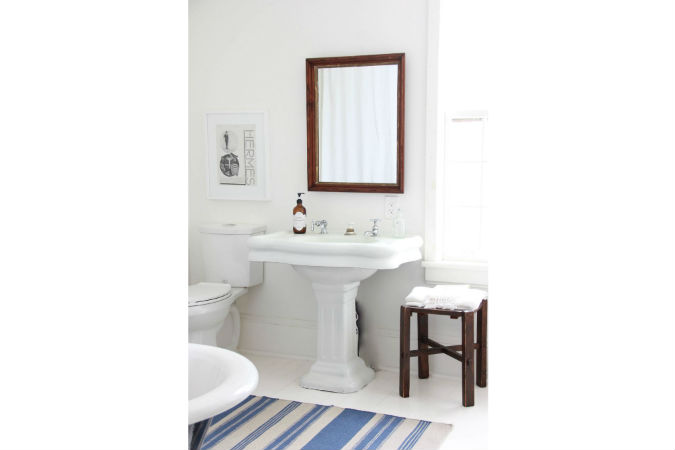
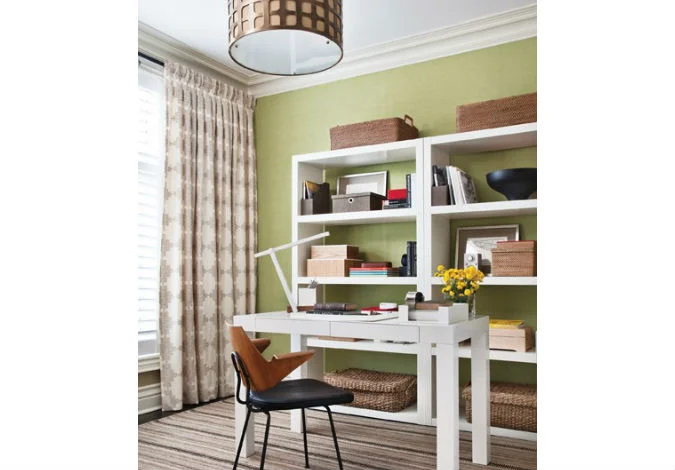
And here are the results! The space was featured in House & Home small space issue in September 2012, see the spread here: http://www.debnelsondesign.com/?page_id=48

Nelson 5809_f
Nelson 5780_f
In Before & After, Deb Nelson Design, Design Work, Inspiration, Small space Tags Before and After small apartment, deb nelson before and after, deb nelson design, Deb Nelson small space, paint makeover, painted floors, renovate a small space, renovate small apartment, renovate with paint, small apartment decorated, small space, stylish small apartment
bath-tup-edit-pix.jpg

BEFORE & AFTER: AN OLD BATHROOM GETS A NEW LOOK

Deborah Nelson October 14, 2014

A bathroom renovation can become extensive pretty quickly. In my case I not only renovated the bathroom, but I actually moved the second floor bathroom to a new location. The house was built in 1844 and had several additions over the years. The original second floor bathroom was over an addition, and when the house was being gutted, all the plumbing was being redone. Since the plumbing all had to go, I also wanted to move all of the new plumbing to be accessible in the basement of the house (previously pipes were running out into crawl spaces and under additions). I was able to layout the house so this worked, and I was so happy to have all the brand new plumbing easily accessible in the basement. The planning of the bathroom took some figuring out. There was a very small room at the front of the house that I felt like would be the best spot to take over for the bathroom. I wanted to use the original pedestal sink and claw foot tub – I especially loved the old chunky hardware on the sink and the tub. There was a time when I thought I wouldn't use the sink, but I'm so glad that I did.

Here is the original bathroom in it's first location before the renovation.

bath before use

This is the small room that I thought should be the bathroom. Here it is before.

bath before 1
bath 2 use

Here it is with me trying the sink in the space, I wanted to see how the sink and tub would look in here. The guys kindly moved the very heavy tub and sink into the space so I could get an idea of how it would look and fit.

during

I decided I loved it. The start of the plumbing for the tub:

during tub

Here is a close up of the sink hardware and electrical wiring being done above it.

bath sink close

And when the changes really start...new drywall, lighting is now in....and PAINT! At this time I also had the base of the claw foot tub painted black.

painting and light
painting 2

And finally the finished, renovated bathroom.

bath tup
bath detail
In bathroom, Before & After, Deb Nelson Design, Design Work, Inspiration Tags adding a new bathroom in an old house, bathroom, changing the bathroom in an old house, deb nelson bathroom, Deb Nelson bathroom renovation, deb nelson design, deb nelson design bathroom, Deb Nelson new bathroom, deb nelson renovation, moving the bathroom in an old house, new bathroom in an old house, new bathroom old house, old sink and tub in new bathroom, old sink new bathroom, old tub new bathroom, original sink and tub in new bathroom, renovating an old bathroom, this old house bathroom renovation, using old fixtures in new bathroom
console-edit-2.jpg

BEFORE & AFTER: CABINET

Deborah Nelson September 18, 2014

Back when I was working on CBC TV doing a regular segment called Deb on a Dime, I was always looking for inexpensive furniture. I'd often go by Value Village and check out the second hand furniture, and this is where I found this cabinet. I wanted to show this makeover because you really can decorate on any budget. Sometimes it means you'll have to get your hands dirty and Do-It-Yourself but you can find some great treasures. The things I always look for are the size and shape of a piece of furniture, everything else can be changed. For this project I needed a narrow cabinet and this one fit the bill. It also provided a pretty good amount of storage inside the unit. I picked it up for $9.99, here it is before:

Console before

It definitely wasn't pretty but I could see the potential. I spray painted it white and I covered the glass doors with frosted vinyl. It didn't take a lot of time, or cost much in materials, to totally transform the cabinet. Here it is after:

console 1
In Before & After, Design Work, DIY, Furniture, Inspiration Tags cabinet makeover, cheap furniture transform, Deb DIY, deb nelson cabinet makeover, deb nelson diy, deb nelson makeover, Deb Nelson on CBC TV, deb on a dime, diy, DIY cabinet, flea market find, Furniture DIY, how to paint a cabinet, paint cabinet white, paint furniture, recycle furniture, skinny cabinet, transform furniture, upcycle furniture
fireplace-edit-pix1.jpg

BEFORE & AFTER: A FIREPLACE GETS A MAKEOVER

Deborah Nelson September 15, 2014

When I purchased my house I loved the original details – and since the house was built in 1844 there were some beautiful, old, unique features. I especially liked the fireplace in the living room and even though I was starting a renovation, I wanted to keep the fireplace intact as much as I could. Here's how it looked before:

fireplace before

Like any renovation, the list of things to figure out and research was extensive. I felt like I got a fireplace PhD pretty quickly! I had a few obstacles to figure out – and I really wanted to keep a wood burning fireplace. I thought about just leave the whole thing alone. But on the flip side of that, the old chimney had no liner or flue, and the firebox opening on this fireplace was huge. So basically I had a giant opening in the living room and in the winter all of the heat would go up the chimney. But the first summer and fall after the renovation I kept the original fireplace (just painted it) to make my final decision. Here is how it looked then.

fp during

By the fall when the weather was getting cold, the lack of efficiency didn't make any sense, so I started looking at wood burning inserts for the fireplace. There were a few I liked, but of course I wanted something flush that didn't look like wood stove stuck in the fireplace. This also would still mean buying wood, chopping, starting fires every day, etc.

In the end I went to a propane (or gas) insert, the biggest reason was the ease of having it. I realized I would likely have the fireplace on in the morning before work and again for a couple of hours in the evening, it didn't make sense to start up a wood fire only to have to put it out again. The convenience of propane made sense for me – although I miss the smell of a wood burning fire.

The propane insert hunt took some time, I wanted something that looked authentic and I went with one that had double doors on it which I think suited the house. I had to rebuild the hearth and surround to make the insert fit in the wide opening of the firebox and the mantel. It all took some time to figure out and calculate the right proportions (how high to raise the hearth, etc.). In the end I'm happy with the decision and with the look!

fireplace edit pix
In Before & After, Deb Nelson Design, Fireplace, The Woodbox Tags adding an insert, deb nelson fireplace, fireplace, fireplace before and after, fireplace insert, fireplace makeover, fireplace mantel, gas insert fireplace, making an old fireplace energy efficient, old fireplace not efficient, propane insert fireplace, should I add an insert
office-edit-pix.jpg

BEFORE & AFTER: OFFICE MAKEOVER

Deborah Nelson September 10, 2014

A few years back I did an office makeover for House & Home magazine. The homeowner worked from home and desperately wanted a new office that was organized, had storage solutions and looked stylish. The room had nice high ceilings, but was so empty it actually echoed! I knew it needed to have drapery and a rug to help with the sound. Here is the room before:

office before

I also wanted to add some colour to the room, so I went with a soft green grass cloth on the walls. I added a new desk and vintage chair (I love this desk chair), and bookcases behind that. I added a large white credenza for storage and made a burlap covered cork board above this. In the opposite corner there was room for a comfortable chair for her office guests.

For people that work from home having a nice home office to go into every day can make you feel more organized and hopefully more productive!

Here are more 'after' pictures from House & Home magazine. All 'after' photos by Donna Griffith.

office p3
office p4
office p2
office edit pix
In Before & After, Deb Nelson Design, Inspiration, Office Tags deb nelson before and after, deb nelson makeover, deb nelson office, grass cloth on walls, grassscloth, green grasscloth, home office inspiration, home office stylish, home office update, how to make my home office look better, how to use grasscloth, office makeover, white desk in office
← NewerOlder →

Categories


Before & After

Living Room

Renovation


INSTAGRAM

Starting to get into the Christmas spirit to be ready for the @ywcahalifax Homes for the Holidays happening November 22-24!  A bit of a natural holiday vibe from my place a few seasons back. This year I'll have it decked a little bit more! 🎄🎄🎄 📷:
Before & After of a much needed little bathroom renovation! The details and gory before pictures (have you ever seen a faucet attached by duct tape?!), are in the link in profile. #debnelsondesign #bathroomrenovation #smallbathroomdesign #beforea
Pretty little detail shot from my Chester sunroom. 📷: @samsonpix  #debnelsondesign #sunroomdecor #shells #showemyourstyled #sodomino #smmakelifebeautiful
A shot of some subtle holiday touches from my Chester place. Now that it's November it's time for me to start thinking holiday decor 🎄to get ready for @ywcahalifax Homes for the Holidays. Just a few weeks away and tickets are on sale now! 📷: @sianc
Lots more of this extensive renovation to show over the coming months!  A quick shot I snapped of my Chester kitchen which has been drastically transformed since the beginning. Swipe over to see the before shot!  #debnelsondesign #kitchenrenovation #
I used a variety of antiques in this guest room - the bed, chair, blanket and artwork were all items I've collected over time.  I love how they add so much character to a room, the antique charcoal sketch above the bed is dated from the 1800’s
Easing you into holiday decorating with one of my favourite past kitchens, featuring a tiny countertop tree and red wool blanket. I’m a big fan of subtle decorations that can make a space feel cozy and festive through the long winter months. My
Open shelving is one of my favourite ways to display those items in your kitchen that are both functional and full of character, like cutting boards, dishes, glassware and even quirky bottle openers 📷: @samsonpix⁣
⁣
#debnelsondesign⁣
#openshelving ⁣

© 2019 DEB NELSON DESIGN